Windows10 Homeに WSL 2 をインストールする
参考ページ
手順 1 - Linux 用 Windows サブシステムを有効にする
- PSを管理者モードで立ち上げて
dism.exe /online /enable-feature /featurename:Microsoft-Windows-Subsystem-Linux /all /norestartを実行する
PS C:\Windows\system32> dism.exe /online /enable-feature /featurename:Microsoft-Windows-Subsystem-Linux /all /norestart

展開イメージのサービスと管理ツール
バージョン: 10.0.19041.844

イメージのバージョン: 10.0.19042.985

機能を有効にしています
[==========================100.0%==========================]
操作は正常に完了しました。
PS C:\Windows\system32>
手順 2 - WSL 2 の実行に関する要件を確認する
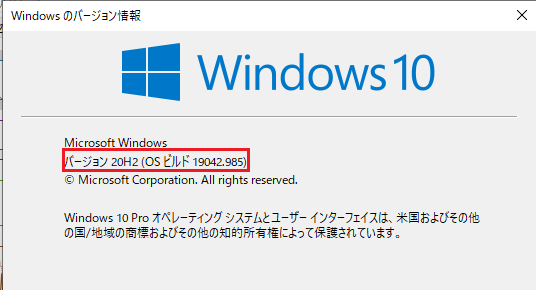
- windows ロゴ キー + R キー を押して、「winver」と入力し、 [OK] をクリックする。バージョンとビルド番号を確認する。WSL 2 に更新するには、Windows 10 を実行している必要があります。
<環境構築の条件>
x64 システムの場合:バージョン 1903 以降、ビルド 18362 以上。
ARM64 システムの場合:バージョン 2004 以降、ビルド 19041 以上。
18362 より前のビルドは WSL 2 をサポートしていません。
手順 3: 仮想マシンの機能を有効にする
dism.exe /online /enable-feature /featurename:VirtualMachinePlatform /all /norestartのコマンドを実行する
PS C:\Windows\system32> dism.exe /online /enable-feature /featurename:VirtualMachinePlatform /all /norestart

展開イメージのサービスと管理ツール
バージョン: 10.0.19041.844

イメージのバージョン: 10.0.19042.985

機能を有効にしています
[==========================100.0%==========================]
操作は正常に完了しました。
※一旦、ここまで設定できたらPCを再起動する。
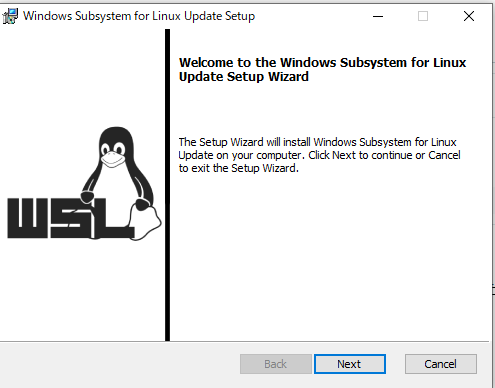
手順 4 - Linux カーネル更新プログラム パッケージをダウンロードする
x64 マシン用 WSL2 Linux カーネル更新プログラム パッケージをインストールしたときに下記のエラーが発生した場合

Windows Insider Programに登録する必要がある。

※Windows Insider Programとは下記のページを参考に insider.windows.com
上記の設定をしてようやく、「Linux カーネル更新プログラム」をインストールすることができる
wsl --set-default-version 2をコマンドを実行すると、WSL2がデフォルトで設定される
PS C:\Windows\system32> wsl --set-default-version 1
PS C:\Windows\system32> wsl --set-default-version 2
WSL 2 との主な違いについては、https://aka.ms/wsl2 を参照してください
DDD/TypeScriptの勉強
ユースケース図

DDD

サンプルコード
class Blog {
    static _id: number = 1;
    id: number | null;
    categoryId: number | null;
    title: string | null;
    text: string | null;
    postDate: Date | null;

    constructor(categoryId?: number, title?: string, text?: string, postDate?: Date) {
        this.id = ((title) && (text)) ? Blog._id++ : null;
        this.categoryId = categoryId ? categoryId : null;
        this.title = title ? title : null;
        this.text = text ? text : null;
        this.postDate = postDate ? postDate : null;
    }

    create(categoryId: number, title: string, text: string): Blog {
      // リポジトリ作成してDB登録処理をする
      return new Blog(categoryId, title, text, new Date());
    }

    update(title: string, text: string): void {
      // リポジトリ作成してDB更新処理をする
      this.title = title;
      this.text = text;
      this.postDate = new Date()
    }

    delete(): void {
      // DBの削除処理
      this.id = null;
      this.title = null;
      this.text = null;
      this.postDate = null;
    }
}

class Category {
    static _id: number = 1;
    id: number | null;
    categoryName: string | null;
    displaySort: number | null;

    constructor(categoryName?: string, displaySort?: number) {
        this.id = ((categoryName) && (displaySort)) ? Category._id++ : null;
        this.categoryName = categoryName ? categoryName : null;
        this.displaySort = displaySort ? displaySort : null;
    }

    create(categoryName: string, displaySort: number): Category {
      // リポジトリ作成してDB登録処理をする
      return new Category(categoryName, displaySort);
    }

    update(categoryName: string, displaySort: number): void {
      // リポジトリ作成してDB更新処理をする
      this.categoryName = categoryName;
      this.displaySort = displaySort;
    }

    delete(): void {
      // DBの削除処理
      this.id = null;
      this.categoryName = null;
      this.displaySort = null;
    }
}

const category = new Category();
let categories: Category[]  = [];
categories.push(category.create('JavaScript', 1))
categories.push(category.create('Python', 2))
categories.push(category.create('Go', 3))
categories.push(category.create('PHP', 4))
console.log(categories)
const blog = new Blog();
const blog1 = blog.create(categories[1].id as number, 'Typescriptについて', 'Typescriptは')
console.log(blog1)
参考サイト
- IDをAutoインクリメントするサンプル https://peopleandbits.wordpress.com/2013/04/09/auto-incrementing-object-ids-with-typescript/
https://typescript-jp.gitbook.io/deep-dive/future-javascript/classes
Dynamodbのテーブル作成とJavaScriptでデータ登録
はじめに
Dynamodb テーブル作成
- ユーザーテーブルの作成用コマンド
aws dynamodb create-table --table-name users --attribute-definitions AttributeName=uid,AttributeType=S --key-schema AttributeName=uid,KeyType=HASH --provisioned-throughput ReadCapacityUnits=5,WriteCapacityUnits=5
aws dynamodb create-table --table-name tasks --attribute-definitions AttributeName=uid,AttributeType=S AttributeName=tid,AttributeType=N --key-schema AttributeName=uid,KeyType=HASH AttributeName=tid,KeyType=RANGE --provisioned-throughput ReadCapacityUnits=5,WriteCapacityUnits=5
データ登録
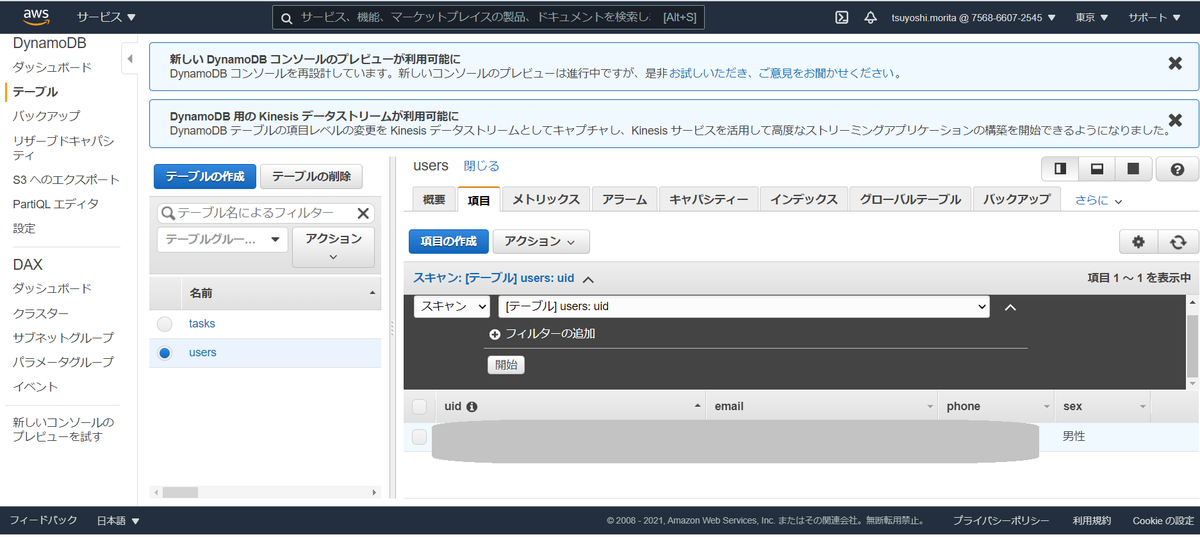
- uuidのパッケージを利用してuidを動的に生成する。登録時にConditionExpressionを指定すると既に登録済のuuidを登録したときにエラーになる。 ConditionExpressionを指定しないと同じuuidのデータがある場合、上書き保存になる。
const { v4: uuidv4 } = require('uuid');
const moment = require('moment');
const AWS = require('aws-sdk');

const db = new AWS.DynamoDB({
  region: 'ap-northeast-1'
});
const uuid = uuidv4();
const email = '<あなたのメールアドレスを指定する>';
const phone = '09012345678';

// ConditionExpressionを指定すると既に登録済のuuidを登録したときにエラーになる。
// ConditionExpressionを指定しないと同じuuidのデータがある場合、上書き保存になる
/* 登録処理
const params = {
  Item: {
    uid: {S: uuid},
    email: {S: email},
    phone: {S: phone},
  },
  TableName: 'users',
  ConditionExpression: 'attribute_not_exists(uid)'
};

db.putItem(params, (err) =>
  if (err) {
    console.error('error', err);
  } else {
    console.log('user added with uid ' + uuid);
  }
});
作成したテーブルとデータ
dockerでdynamodb環境を構築する
はじめに
- 下記のページを参考にdockerでdynamodbの環境を構築する docs.aws.amazon.com
docker-compose.ymlの設定
- 下記のdocker-compose.yamlファイルを用意して,
docker-compose buildを実行する
version: "3.8"
services:
  dynamodb-local:
    command: "-jar DynamoDBLocal.jar -sharedDb -optimizeDbBeforeStartup -dbPath ./data"
    image: "amazon/dynamodb-local:latest"
    container_name: dynamodb-local
    ports:
      - "8000:8000"
    volumes:
      - "./docker/dynamodb:/home/dynamodblocal/data"
    working_dir: /home/dynamodblocal
  app:
    image: "node:lts-alpine"
    working_dir: /opt/app/
    volumes:
      - ./app:/opt/app/
    ports:
      - "8001:8001"
    tty: true
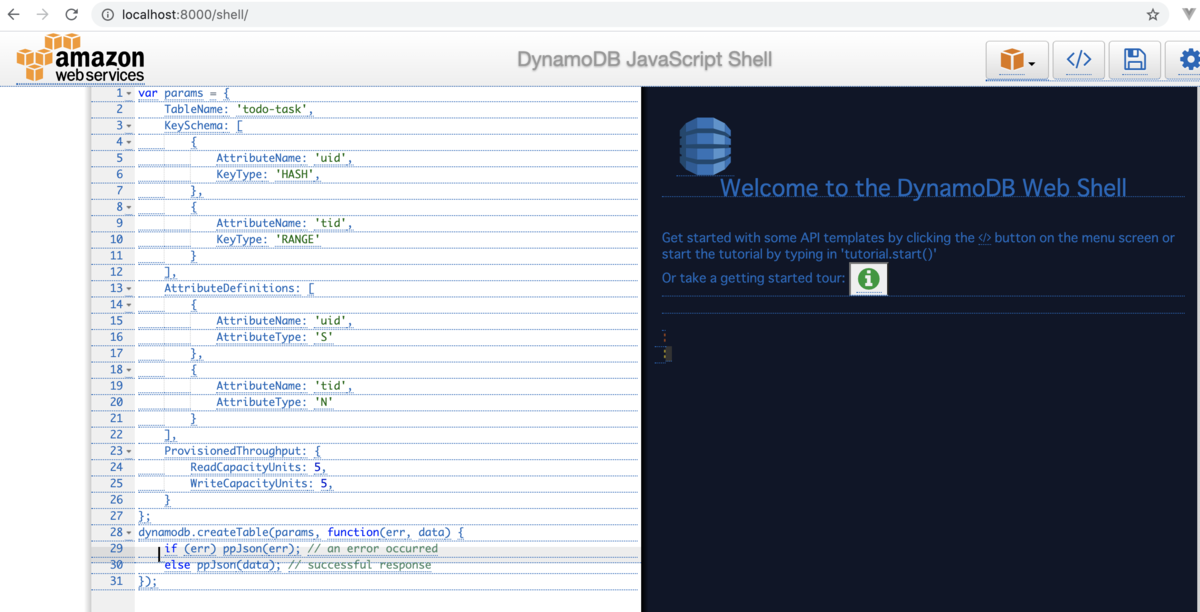
シェル画面へのアクセス
docker-compose up -dでhttp://localhost:8000/shell/にアクセスするとjavascriptでdynamodbを操作する事ができるshell機能にアクセスする事ができる
シェルに慣れていない場合
- dynamodb-adminを利用してGUIベースでテーブルの作成とデータの登録ができる www.npmjs.com
インストール
npm install dynamodb-admin
dynamodb adminの起動方法
http://dynamodb-local:8000のdynamodb-localはdockerのコンテナ名を指定します
DYNAMO_ENDPOINT=http://dynamodb-local:8000 ./node_modules/dynamodb-admin/bin/dynamodb-admin.js
dynamodb adminの画面
- dyanamodbをGUIから操作するインターフェースが提供されるので便利

prisma.jsで覚えたメモ
はじめに
- prisma.jsを触って覚えたことをまとめてみました。 www.prisma.io
Viewテーブルをprisma.jsから利用する方法
- 下記のようなviewテーブルを作成した場合
create view productlist as
  select id,
              name
   from product;
npx prisma introspectコマンドを実行しても定義が出力されないのでprisma/schema.prismaファイルに手動でviewテーブルの定義を追加する
model productlist {
   id       Int @unique
   name String @db.VarChar(255)

   @@map("productlist")
}
※Viewテーブルの場合、特にユニーク制約などはつくなくて良いのですが、指定しないでnpx prisma generateを実行するとエラーになるため、idフィールドに@uniqueを指定するようにしている。
error: Error validating model "productlist": Each model must have at least one unique criteria that has only required fields. Either mark a single field with `@id`, `@unique` or add a multi field criterion with `@@id([])` or `@@unique([])` to the model.
- 下記のコマンドを実行するとviewテーブルのモデルを利用する事ができる。
npx prisma generate
検索フォームの条件によってwhereの条件を変えたい
- 下記のように検索フォームの条件が何もなかった場合、undefinedを指定すると検索条件とみなされずに
select * from productlistで実行される
const conversions = await prisma.productlist.findMany({
  where: {
    name: {
      contains: searchName ? searchName : undefined,
    },
 }}
)
実行されるモデルのSQLを確認する方法
- PrismaClientに
log: ['query']を指定するとconsole.logにSQLが表示される
const prisma = new PrismaClient({log: ['query']})
約11ヶ月続けたブログ更新をやめるて、不定期更新にする
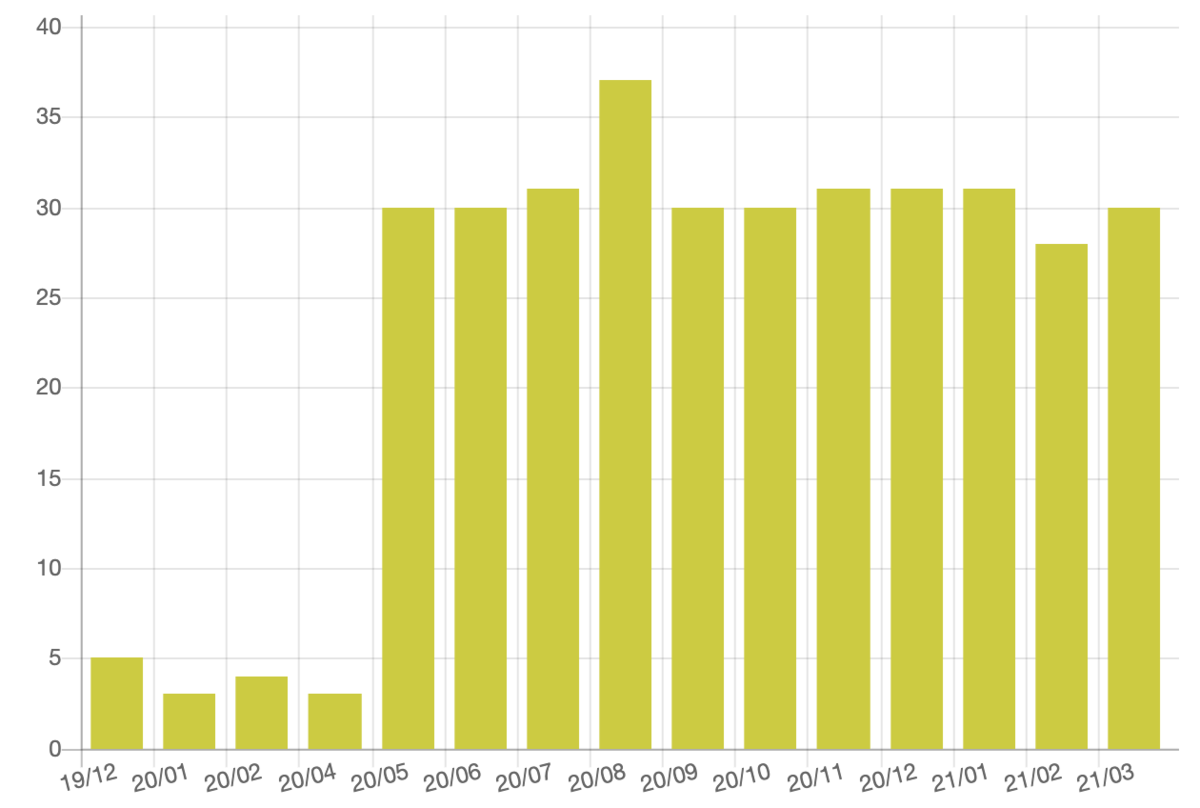
約11ヶ月毎日ブログを更新していた。
- 2020年4月30日から2021年3月30 日までブログを毎日更新していました。下記のついtwilogのログとなります。
ブログの更新をしていてよかった事
- 毎日、インプット・アウトプットする習慣化する事ができた。
- フロント周りの技術をした事がなかったが、ReactやVuejsを触れる機会ができて仕事にも役にたった。
- サーバーをGMOのレンタルサーバーからAWSに移行する事ができた。dockerでいろんな環境を作ったので、dockerをそこそこ覚える事ができた。
- pythonやkotolinなども少し触ってみた
今思うといいことしかなかったと思ってます。
なぜ毎日更新をやめるのか
- 勉強する習慣化ができたので、今度はこのブログ更新の習慣を個人開発に向けたいと思ってます。せっかく勉強した知識を使わないと意味がないのと、実戦で得られる知識は、また大きいと思うので。
※でも月に数回はブログを更新していきたいと思ってます。
vue-selectをnuxtjsに適用する
はじめに
- 下記のライブラリをインストールする github.com
インストール
npm install vue-select
設定
plugins/vue-select.jsファイルを作成する
import Vue from "vue";
import vSelect from "vue-select";

Vue.component("v-select", vSelect);
nuxt.config.jsファイルのpluginsに下記の記述を追加する
plugins: ['@plugins/vue-select'],
組み込み
- pages/index.vueファイルに下記の記述を追加する
<template>
<v-select id="vselect" v-model="selected" placeholder="Select Category" :options="options"></v-select>
</template>

<script>
import "vue-select/dist/vue-select.css";

export default {
  middleware: 'privatepage',
  data: () => ({
    selected: '',
    options: ["Hoge","Geho","HogeHoge"],
  }),
(省略)
<script>